First of all, I would like to thank Swathi Iyer for letting
me suggest this month’s challenge. Thanks a lot, Swathi J For this month’s challenge, I have
suggested two types of cracker – SALTINE, GRAHAM CRACKER.
So, what is this CRACKER?....
- A cracker is an baked snack that can be sweet and savoury (Mostly savoury). Alternatively, they are also termed as an ‘savoury cookie’.
- Name of this snack, is believed to come from the caused noise, when these are broken into half.
- Crackers are thin, crisp with an usual square or circle shape. They are known to be topped with herbs, salt, spices or other seasonings.
- They are usually served with dips/cheese-spread/butter/milk.
- These cracker can be yeast-raised or baking powder raised, so in order to prevent raising of dough during baking , these crackers are drilled with holes before switching them to oven, these holes, otherwise called as docking holes, is one characteristic feature of CRACKERS.
DIFFERENCES BETWEEN CRACKER AND COOKIE:
The difference chart shown below depicts the basic differences between cracker and cookie

Commercial examples for crackers include Maska-chaska, Monaco and Brittania crackers, etc.
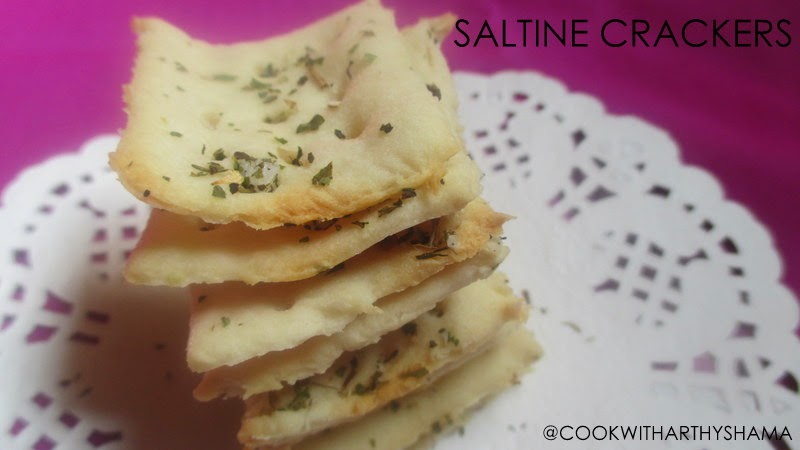
SALTINE CRACKER
An flat, crisp, square-shaped cracker with sea salt
sprinkled on top is called as saltine cracker.
This saltine cracker is an delicate cure for journey sickness or as an
palate cleanser between food testing.
This cracker, is notably yeast-raised.
Adapted from KING ARTHUR FLOUR -

PREPARATION TIME: 20
minutes (excluding overnight refrigeration)
BAKING TIME: 10-12
minutes (I made them, like four batches)
YIELD: 40-45 crackers
INGREDIENTS REQUIRED:
· Pinch of salt
· Pinch of Baking soda
· 2-3 drops of vinegar
· ½ tsp sugar
· ¼ cup lukewarm water
· 1 and ½ tsp active dry yeast
· 3 tbspn water
· 1 tbspn butter
· 1 tbspn oil
For the topping
· 1 tbspn dry herbs (You could also prefer any seasoning, or any specific herb)
METHOD:
Bring last three ingredients (water, butter and oil) to boil, in an vessel. Stir till butter is melted, keep aside. Cool
them till they are lukewarm.

Mix yeast with lukewarm water and sugar, keep aside.
In an separate bowl, take the dry ingredients together like flour, salt, soda. To this add vinegar and gently mix through. Now add in yeast mixture, by making an well and mix. After yeast is mixed well, pour our lukewarm wet ingredients and mix to form an soft, sticky dough


Transfer this dough to an greased dry vessel and cover with an cling wrap. Refrigerate overnight.
After an overnight resting, dough wont double as such, but still an ‘little’ rise is okay. Bring this to room temperature and keep them over the working table dusting with excess of flour.


Press them into an rectangle of 7*12 cm. This will make your rolling process easier.


Roll them into an sheet of 22 *24 cm . Again, you will have to dust with lots of flour, in order to obtain this sheet.

Fold them through left half vertically. Repeat the same through right side, till this resembles an ‘envelope’. Pre-heat the oven to 200 degree Celsius.


Turn them to 90 degree and start rolling. This folding and rolling is done, in order to get an flaky cracker, the ones you see in commercially known Britannia 50-50, Monaco etc.
I rolled them, till I got an very thin sheet. About, 34 *20 cm. You can forget about measurements, also the shape, here, but remember to get an very thin sheet.


I cut them horizontal and vertical lines, with 4 cm as an apt length for each of my salting cracker. Spread topping uniformly and press them with help of rolling pin under an baking sheet, in order to stick the topping over crackers.


Cut them over the drawn line, place in baking sheet and make holes using grilling stick/toothpick. Be careful when you separate them, these crackers will be sticky.

Bake them in pre-heated oven for ten to twelve minutes. Watch them closely, as they can easily burn or brown, remove from oven till edges are slightly brown and cool over wire rack completely.


No comments:
Post a Comment
Hi guys..
Kindly drop by ur suggestions for my post... Ur beloved comments/suggestions mean a lot to me!